This match report covering the Thornbury – University B game has been much delayed. It isn’t pleasant to address losses, but for the sake of keeping our committed readers up to date and respecting journalism principle, we musn’t omit the ugly bits. Herein, we will go through a few games, and all of our excuses.
The only win came from B team new comer Ignacio, who has had a streak of wins since joining the C team at the beginning of the year.
Though the game was ultimately decided by a one move full Rook blunder and a clean, safe conversion, it was interesting to note how Black made use of so called ‘Pawn breaks’ in his game. This motif has the ultimate goal of gaining central control, or alternatively piece development.
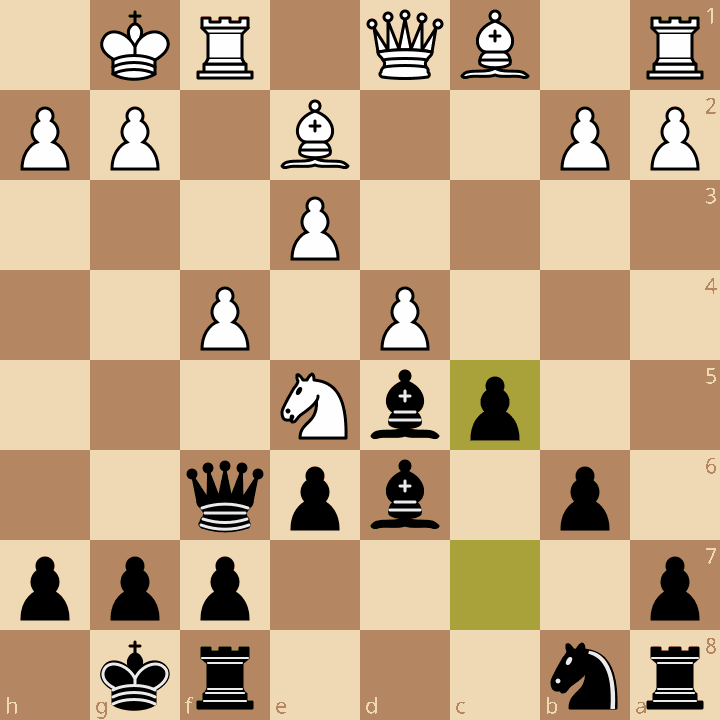
The idea behind this apparently innocuous move is as follows; if White captures, Black will take back with his Bishop. White would effectively lose a central Pawn AND help Black out, with a piece slicing through a soft spot in the position. On the other hand, Black has threats of engendering an isolated Pawn if White’s Queen ever wanders off, should the Pawn on e3 become solely responsible for his comrade’s safety.
This is also a good example of what chess players mean with words like ‘pressure’ or ‘tension’, each side has to dextrously navigate the position keeping these threats in mind for the next few moves. Black is giving themselves options, and White will have to deal with these implicit threats sooner or later.
In short, such ‘Pawn breaks’, though of subtle appearance, put on much more pressure than meets the eye. To set these up, it has to be both disadvantageous for the aggressed (White here) side to capture the flank Pawn, and advantageous for the aggressor (Black) to trade Pawns in the center,
Ultimately, White played Bishop to f3, keeping an eye on their central Pawn with their Queen.
The second Pawn break of interest was f6.
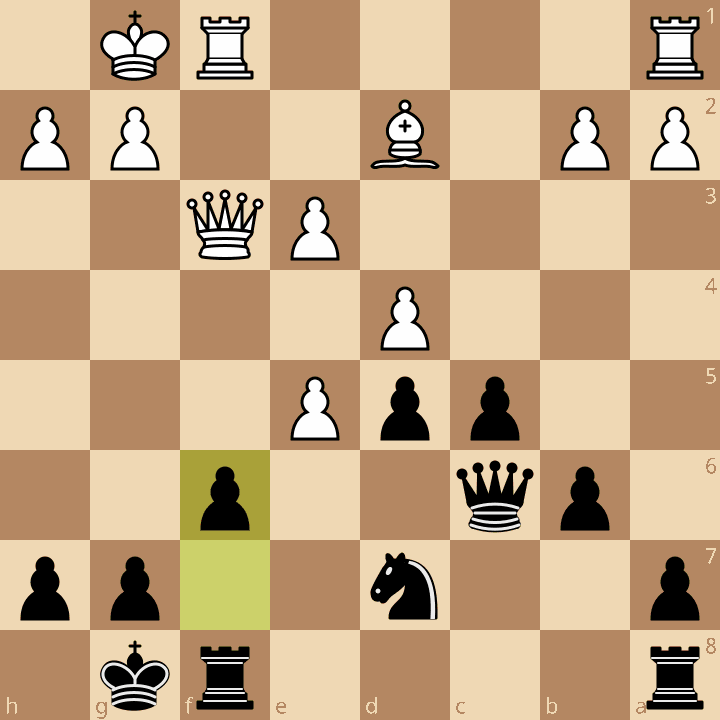
The saying goes “f stands for forget about it!” when talking about pushing one’s f Pawn. The fact that this implicit rule is being breached tells you how advantageous a Pawn break can be. We again see that if White captures on f6, Black can recapture with the Rook, planning to double up and take control of the f file…
…Or with his Knight in order to plop it into e4 (the resulting position from the Knight recapture would also be a textbook example of a good Knight versus a bad Bishop, another very well known motif in chess literature). In either case, White would lose central control and dramatically improve Black’s piece quality.
What is the alternative? See the game continuation, where the Black Pawn is ignored, and Black trades Pawns on e5.
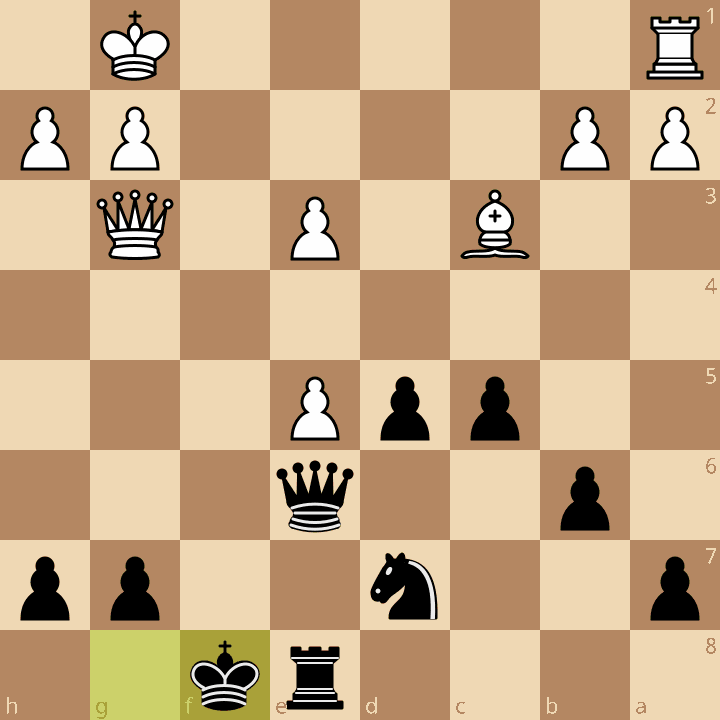
A few moves later, we see White’s structure in a sorry state. Note this sequence followed a Rook exchange, with Black seeking to maintain all three pieces trained on the e5 Pawn, in case you were wondering why King takes on f8 was played.
In fact, the full Rook blunder mentioned earlier came about from an attempt to keep this shell of a Pawn on the board.
Again, thank you Ignacio the Pawn Star for this instructive play despite being picked up on short notice, and very conveniently was at Thornbury’s locale to begin with, avoiding the 45 minutes bus ride.
Now onto my own game, which I will say upfront was lost. I nonetheless felt proud of my play, and I suspect my opponent did as well.
The first couple dozen moves were somewhat slow and positional in nature, both of us fighting for a hair of an edge. We were left with two Rooks and a minor piece each, with the dynamic elements of the position revolving around 1) Who had the superior minor piece, and 2) who had better control of the open files. In that vein, White’s idea in the above position is to get a Knight on g6, blocking the file, and then control the f file. Black would like to control the g file, and make use of their monstrous Bishop to threaten checkmate.
I felt comfortable in my position, and indeed I was given tactical opportunities which I had missed, wherein White trades a their Knight for one of Black’s Rook’s. I don’t know if I would have gone through with the tactic even if it was spotted, as the subsequent variation leaves Black with a central hoard of Pawns, threatening to promote, and even now I have a hard time interpreting the computer’s preferred moves.
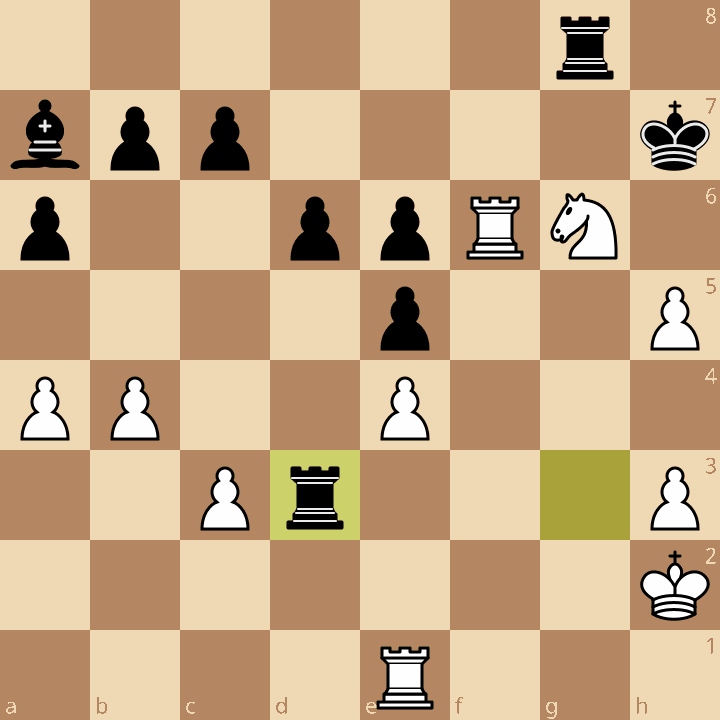
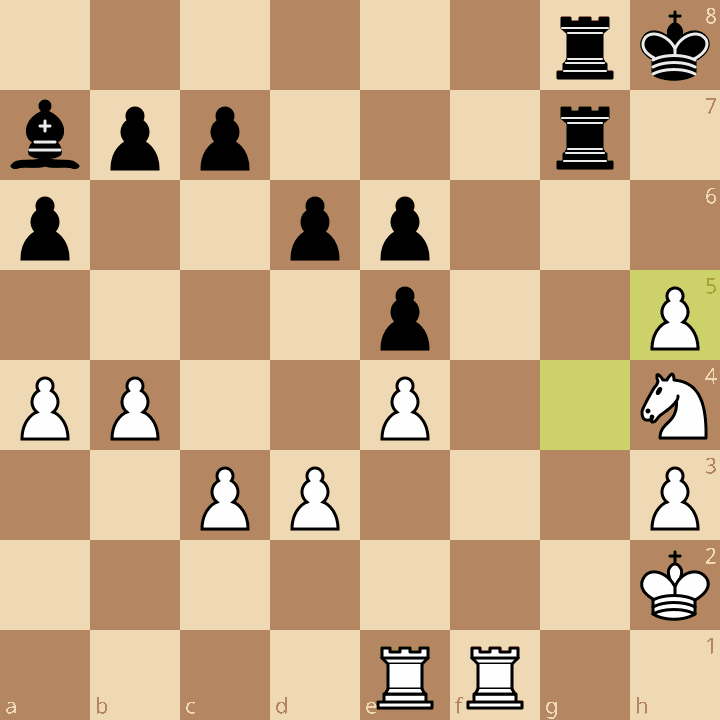
My evaluation up until this point had been that White was the one to play for a win. My Knight could not be improved, and I was getting hold of the f file, as I wanted. With misguided confidence and eagerness to get back home, I brought my King up the board, as one should in an endgame. Kh4! What could my opponent possibly do?
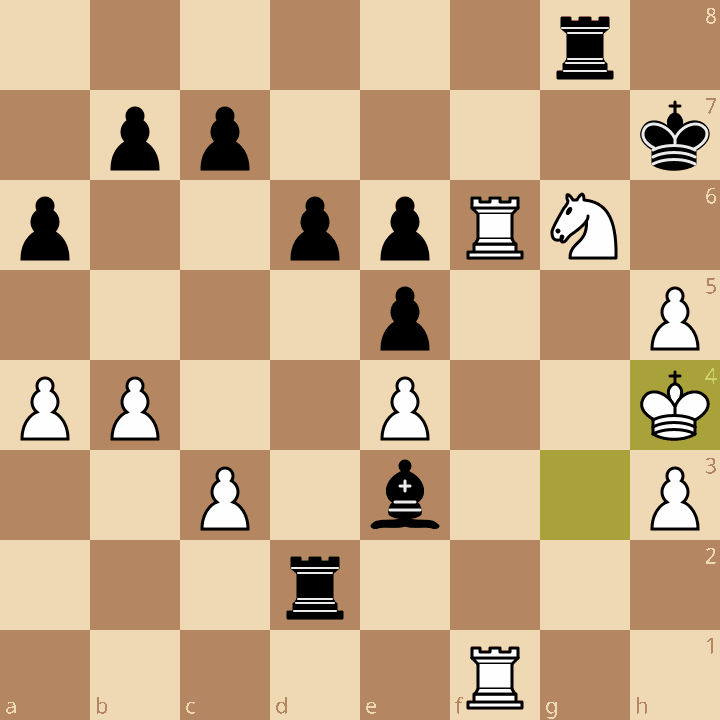
To those with a keen eye, you may have noticed my King becomes very short on squares…
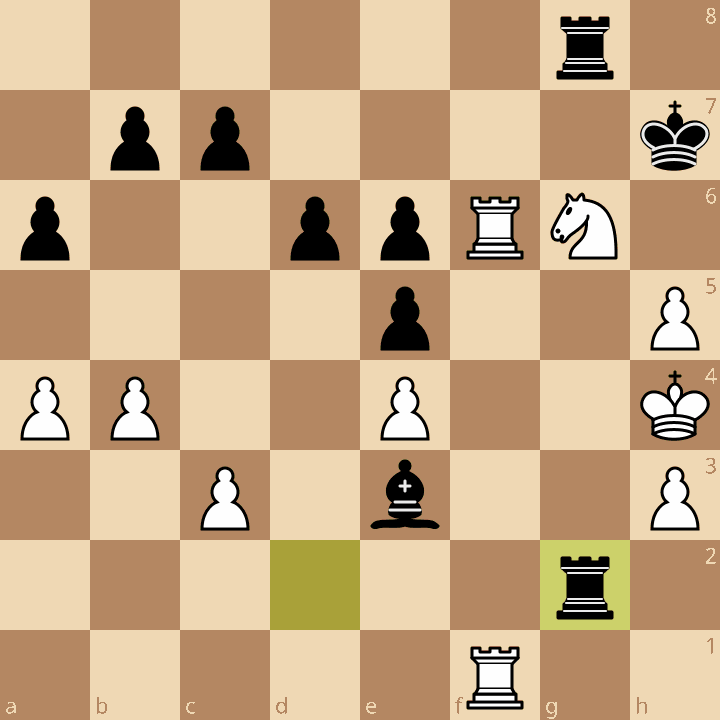
…And I realized too late I have spun my own mating net. There is absolutely nothing to do for White, who will have to give up material just to stay alive. It is hard to stop Black from going King to h6, followed by Bishop to g5. A desperate Knight to f4 was played, and resignation followed soon after.
Anyways, this was the B team’s first loss of the season, 2-4. It is rendered all the more vivid with league rivals Horfield & Redland leading by one point over us, and Team Captain Jonas Zurba, held hostage by end of term dead lines, being unable to attend for this game.
We are gearing up to face Horfield next, and plan to take on Thornbury on home turf next time around!